Aloha, this is my first experimentation attempting to make my own 'washi' style decorative tape. I see decorative tapes all over the place and had to try some crafts for myself. Ultimately, I'd like to get a system down and use Polynesian clip art, prints and images for possible packaging of my own items.
This is what I made so far. Baby steps first.
I started with an idea to use tissue paper images on my pen. Dug through my gift wrapping tissue stash and decided on this one.
I had this double sided Scotch brand tape already.
Here is the tissue paper out of the package. Just clipped a few images I wanted to try out. Decided on a wahine playing a ukulele and two pink accent flowers. I liked the size of the wahine - fit nicely on my pen. I did use two adjoining strips of tape to get the entire image.
This is how I wrapped the larger image on the pen. It does not wrap completely around.
Here is a side view showing where I put the larger of the two accent flowers across the open area on the back side. The other smaller flower I placed on the pen cap.
Close up of the image. I like how the tissue paper has an opaque look.
Close up of the back side with the joiner flower.
My second project was using a small square piece of Japanese print origami paper I had in my craft supplies also purchase at our local office/craft supply store Fisher Hawaii. It has the texture of handmade paper. This is the section left after I cut my strips and added the Scotch tape to them.
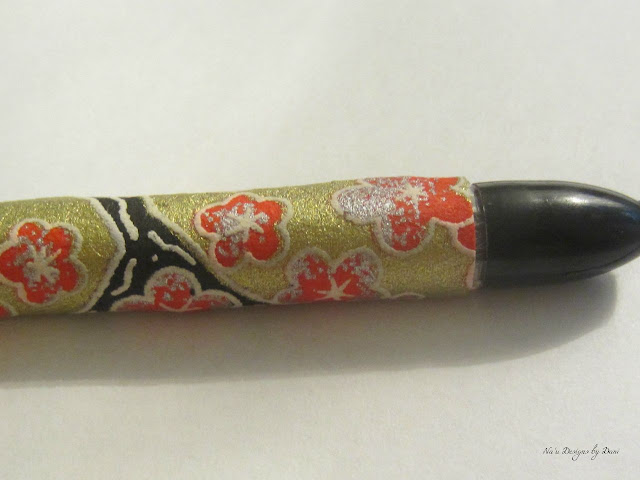
Here is the finished pen. I really like the way the black in the paper goes with the black on the pen. I first tried to wrap the strips of paper around the pen at an angle and did not like the outcome. I decide to try two strips vertically on either side, overlapping a tiny bit. This seems to show more of the design of the paper. Added a horizontal strip to the cap. The strip on the cap is an example of the size of the strips I used - 3/4".
It's not perfect, but I like the look. The overlapping edges are not laying totally flat - I may need to add a touch of some sort of glue or some Mod Podge.
You can see the tape lifting a bit at the top of the pen and in the photo below along the overlap.
Overall - it was a fun project and I really enjoyed using this tape idea.
So.....I used the last paper strip i had taped up to decorate my cosmetic mirror sides.
Close up view. I cut the last 3/4" strip vertically down the middle and used 1/2 on either side of the edge of the mirror.
Then I moved on to see what else on my desk I could decorate..... found some clothes pins. Perfect! I use them to hold back my thin curtains during the day.
Again, I used two different Japanese print origami squares I had on hand. I have to admit, these were a little trickier than the pen to cover. The clothes pins are thin and I had to experiment with the width and length a bit before getting it to fit right. Let's just say I got sticky tape on my nice scissors trying to trim the taped paper to the right size!
Overall - I am hooked on playing with variations of this 'washi' tape trend. It is fun and lets you be so creative. Google or search on Pinterest for decorative or 'washi' tape to get more ideas.
Mahalo for stopping by! Hope to be doing more creative projects of my own in the future to share with everyone.


No comments:
Post a Comment